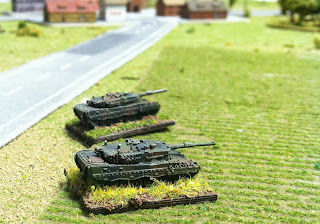
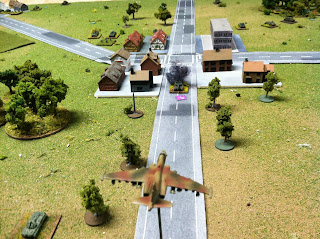
Wednesday, November 6, 2013

Battlegroup Overlord AAR

This is a report of a game Dan A., Phil D. and I played on November 3.   A 500 point match-up between a British Armored force and a German Panzer Division force.

(I apologize in advance for some blurry photos and the funkiness of blogger).

Dan brought his beautifully painted British models and I provided the Germans.  1/72 (20mm) models from various manufacturers.

Here's a sample of Dan's work:


The scenario was Recce Screen from the BGO book.  We used a 6 x 4 space.

The Germans fielded:

Senior Officer in Pz IVH
Panther Platoon (actually, 2 Panthers and a Pz IVH)
Panzer Grenadier Platoon, veterans, on foot
Panzerschreck Team
HMG Team
Sdkfz 234/2 Puma

The British force consisted of:

Senior Officer (in a Daimler Dingo?  Can't keep all those Brit armored vehicles straight!)
Infantry Platoon
Piat Team
Mortar Team
Vickers HMG Team
Sniper Team
Tank Troop (2 Cromwells and a Firefly)
Achilles
Supply Vehicle (Lloyd Carrier)

Here's a map of the battlefield shortly after the start of the game, with only the recon forces on the table.


And photos of the layout:


Germans entering the battle from their table edge:


Both sides rushed armor to the scene of the action and a tank duel developed in the center:


A Cromwell and the Achilles outflanked the Panther, side shots hitting, but only managing to pin (that Panther's crew would eventually abandon the tank when I rolled a 1 on a morale test):  


But the two British tanks are in turn  knocked out by the German Commander and another Panther trailing the lead German tank: 


A Pz IVH takes advantage of the confusion in the center by swinging onto the German left flank, bringing a Cromwell covering the British right under fire and knocking it out.  


This map shows the movements:


That German tank then flanked the Firefly in the center, the only British tank left, and unleashed a salvo into its side armor.  Two Misses!  (rolled snake eyes).   The Firefly made the most of its luck and avenged the Cromwell,  knocking out the Pz IVH in its turn:


This left only the Firefly and a Panther operational. The remaining Panther moved around the German right, trying to bring the Fireflly under fire.   But the German crew didn't count on a PIAT Team lurking in the woods.   One shot into the Panther's flank, one kill!


 Meanwhile, an infantry fight had been raging in the wooded hill in the center of the table to see who could control the central objective:


British mortar providing fire support:


This infantry fight turned into a real meat grinder with engagement ranges of 6" or less.   The British employed fire and maneuver tactics, with the Bren teams using area fire to try to pin the enemy after which the Rifle Team would Close Combat.  Using these methods the British eliminated one German MG34 team.   

The Germans opted for brute force, using direct fire instead and trusting to pass the observation rolls for obscured infantry.   The Germans luck held out and the British took heavy casualties.  One German Rifle Team (with an MG34) singlehandedly eliminated 3 British infantry units and passed two Beyond the Call of Duty tests in a row.   Iron Crosses for them!

I should also mention that luck also favored the Germans in the BR counter department. I pulled no fewer than 4 event counters meaning that four of the pulls not only did bad things to the British, but didn't deplete the German BR. 

Ultimately the losses were just too great for the British and they reached their BR first, giving the Germans a victory.


\


Saturday, October 19, 2013

Battle of Seerhausen-Conclusion

This post picks the game up at Turn 4.   NATO forces had been devastated by Soviet air strikes.   Two companies of Leopard II's had been wiped out.  A sole platoon from the third company was all that was left of the German Panzers.   That lone platoon and 3 under strength companies were all that remained to stop the Red Tide.

More Russian air attacks knock out Marders defending Groningen:


An SU-24 bombs the woods near Bernberg with laser guided bombs.  Miraculously, both bombs miss their target.


The lone Panzer platoon fell back out of the T-80's effective range while Marders in Groningen fired their ATGM's hoping to take out the T-80's. One more platoon would have caused the entire tank battalion to take a Quality Check.  Alas, it was not to be as all the German's shots missed.   In return, the T-80's finished off the last Panzer.


On the flank toward Bernberg the Soviet Tank battalion decided discretion was the better part of valor and decided to exit the battlefield off the NATO table edge, scoring the VP, instead of trying to assault the Pz Grens holding the objective in the woods.

The Soviet MRR then assaulted the Pz Grens holding the woods in the center of the field.   This caused the Pz Grens to fall back out of the battle. 


The battle ended with the Pz. Grens still holding the objective, but the Soviets had not lost any combat units, had advanced two tank battalions off the NATO board edge and scored a major victory. 


Things are going much better for the Soviets on the Southern Route than the Northern Route thus far.  The final battle of the first day of the campaign will feature the 44th Gds Tank Rgt. making a Hasty Attack. 

Sunday, October 6, 2013

Battle of Seerhausen- Race to Weser FFT3 Campaign

This is a report on the 3rd battle of the campaign.  A Hasty Attack by the 7th Gds. Tank Regiment, 11th Gds. Tank Division.     The 7th Gds. Tank Regiment as an Average Quality Rating.  As usual, the regiment consists of 3 tank battalions (T-80B) and one mechanized infantry regiment (BMP-2) backed up by a battalion of 155mm SP artillery and 7 airstrikes.  They also had a Recon Company of two platoons.

The defenders are a Panzer Battalion (3 companies of 2 platoons each) and a Panzer Grenadier Battalion (3 companies of 3 platoons each).  They are supported by a company of Jagpanzer Rakettes and a company of Roland SAM's.

Rain in the area reduced visibility to 3000 meters (30"). 


Overview of the Field

NATO Deployment

NATO Deployment from Opposite Side
Leopard II's lay in wait. 


Panzer Grenadiers defend the Objective


SOVIET TURN 1


View of Russian forces as they enter the battle area

On the Soviet first turn a recon unit was able to make out a platoon of Leopard II's on the autobahn behind Seerhausen and quickly called in an airstrike. (Recon units get 5" extra spotting distance and the tanks were just in visibility range despite the rain).   An SU-25 arrive loaded with 2 Guided Bombs.  These usually spell death for tanks, but this time both bombs missed their target.


A near miss for the German tanks!
A second strike was called in.  This time medium GP bombs struck home.
One platoon failed its Quality Check  and routed out of the battle. 

Panzer Co. on German left flank uses overwatch fire to knock
out a platoon of T-80's that had advanced into visibility range
Soviet Tanks under overwatch fire from Jagpanzer Rakettes,
armed with 1st Generation ATGMs. These weapons aren't very effective against modern tanks. 

NATO TURN 1
 M109's bombard Tank Bn. advancing toward Bernberg and Panzer Co. next to Bernberg brings them under fire, knocking out one platoon and causing another platoon to rout.

Meanwhile, remnants of Panzer Co. in the center advance through Seerhausen
and bring Soviet Mech Inf. Bn under fire, 

Panzer Co. on German right flank advances from in front of Groningen to gain LOS to Russians
advancing behind cover of the woods

Their fire knocks out two platoons of T-80's.

SOVIET TURN 2

Russians call in more air strikes.   A flight of SU-25's armed with Guided Bombs knocks out
 the entire Panzer Co. holding the German left flank


Yet another air strike knocks out the remaining platoon of the Panzer Co.
that was defending the NATO center at Seerhausen
Mech. Inf. Bn. advances into outskirts of Seerhausen and adjoining woods.

Tank Bn. on Soviet left flank advances beyond woods and opens fire on German SAM battery. .

.
... and knocks out SAM battery.   With the destruction of the Panzer Co. by the airstrike
the NATO left flank is wide open
Tank Bn. brings Pa. Jagr.'s under fire, knocking out two platoons.

NATO TURN 2

Marders in the woods open up on Tank Bn. with Milan ATGM's but fail to score any hits.

The battle continues in my next post.  Things not looking good for NATO.

Friday, October 4, 2013

Race to the Weser Campaign Continued (FFT3 Moderns)

I'm still in the process of playing the first turn of this campaign using Bryan Barnard.

 The first battle was on the Northern Route of advance and a resounding defeat for the Warsaw Pact with the 55th Gds Tank Rgt. taking very heavy losses when they tried to push though a Panzer Battalion and Panzer Grenadier battalion with an Excellent Quality rating.

This is a brief report on the second battle, also on the Northern Route, pitting the 79th Gds. Tank Rgt. against a German force.

The Soviets were rated Marginal.

The Germans consisted of a Panzer Battlion consisting of 2 full companies of Leopard II's and one company with 2 platoons instead of three, and a Panzer Grenadier battalion.   These two battalions were supported by a company of Roland SAM's and a company of Jagpanzer Rakettes.    The Germans also had a battalion of M109's in direct support.

The Soviets had 6 airstrikes in addition to their regular artillery support consisting of a battalion of 2S3's in direct support.   But due to the fact that the WP troop quality was only Marginal versus the German Excellent it was going to be a very tough fight for the WP.

I played the Germans.  The WP was commanded by "guest" General Aleksandr Aimetteakov.  (Alex A.)

The Soviets advanced onto the table with 3 tank battalions abreast (T-80's) but chose to send the  mechanized infantry battalion (BMP-2's) on a flank march around the Nato right flank.

The weather was light rain and maximum visibility was 3000 meters (30").

The objective was a highway cross roads.  The WP could also score VP's by exiting combat units off the NATO table edge.

Here is a view of the initial  German deployment


The Soviets advance:


T-80's and recon  in a hull down position with another tank battalion advancing behind

The fire from the Leopards took a heavy toll on the advancing T-80's.   The only bright spot for the WP were the air strikes which featured a number of SU-25 sorties armed with guided bombs. These destroyed an entire platoon of Leopard II's.


The Soviet Mechanized Infantry battalion came in on the NATO right flank and attacked the town, overwhelming the Panzer Grenadier company defending it. 


This allowed the Mech. Infantry Battalion to move off the NATO table edge.  The WP was also able to exit one of the Tank battalions off the NATO side.

At the end NATO had scored 4 VP to the Soviet 3, with the Soviets losing the better part of two Tank battalions. 

So far the campaign has not gone well for the Soviets, losing both battles on the Northern axis of advance.  The next fights will be on the Southern axis.